
Starting this effort, I expected that I may need to wrestle with proprietary image formats. I thought that I might need to contact my old colleagues at Siemens, asking them to preprocess the files on my CD (which had no extensions) into Matlab data files that I could easily work with. Nope. It turns out that the files are DICOM images which can be easily loaded by standard Matlab functions.
So, I began by examining all images that were present on the CD. There are some "mosaics" for diffusion weighted imaging scans:


Next, I took the one set of the anatomical scans, and loaded it into a 3D volume data in Matlab. Conveniently enough, the pixel pitch is 1 mm in all directions:

(There's significant "fuzz" around the bottom of the image, by the chin. Perhaps a filter such as the bilateral filter may be appropriate to denoise and yield better output surfaces...)
The next step is to extract an isosurface that captures the gyri of the brain. (Learning anatomical terms here!) Prior to the isosurface extraction, I've found it useful to use an averaging filter to reduce speckle. This step thus involves some trial and error to find the appropriate parameter values for the filter width and appropriate isovalue. The isosurface is represented as a "patch" object, which is essentially a triangulated surface. The preferred file format of the 3D printing community is "STL", which also consists of triangulated surfaces. So, it's quite easy to write an export routine from Matlab to the STL format.
The raw output of the Matlab isosurface extraction routine was quite gruesome like a zombified self portrait:

Nevertheless, I could tell that the brain was more-or-less captured by this output, and I moved to "clean" the resulting model using a low-level 3D model editor called Netfabb. This was a bit of a laborious process since it's editing the 3D model at the level of individual triangles. Moreover, there were some "issues" with the isosurface extraction, with bodies that were not completely closed, or nearby surfaces that erroneously fused, etc. Furthermore, I had to make an on-line decision for which parts of the model to keep, and what other parts to throw away. This was relatively straightforward for the top of the skull, but the model was very complicated in the vicinity of the spinal cord.
An amusing side note: The triangles that represent a surface are oriented -- that is, they have an "outside" and an "inside" face. Netfabb by default displays the outside face as light blue, and the inside face as dark red. This meant that, as I was cutting away excess material around my brain, the model became bloody! Here's a screenshot from an early attempt at cleaning the model:

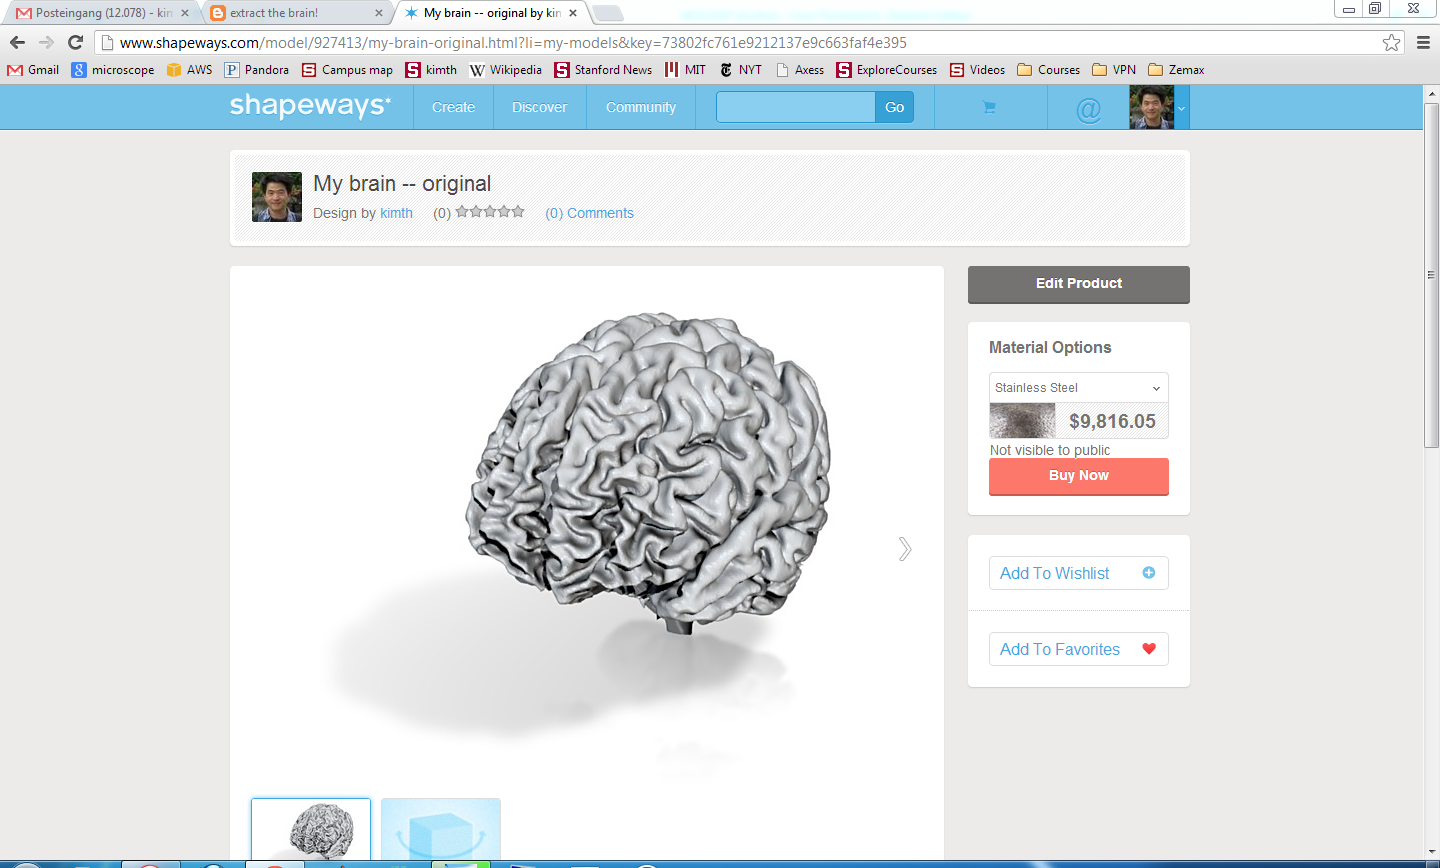
After a few hours of working with Netfabb, I became somewhat adept at cleaning and repairing the brain. Here is the final result:

To begin, I was able to print a 1/3 scale model of the brain in plastic at Stanford (with the help of Joan, my personal mechanical engineering guru!). The full scale model, printed in stainless steel at Shapeways, will cost $10k! I'll need to hollow out the interior mass...
No comments:
Post a Comment